TP Roll Mini

Hello Hello
How was your holiday celebration? Fantastic I do hope and everyone made it through safe and sound. Now it's back to life, back to reality huh? Bummer!
I'll wish you and I both a quick and easy Monday

As for right now I wanted to share with you the last style of mini book that I made for my Pirates Cheer Mini Series. Yes you heard me right...the last one finally. Seems like a long time in coming I agree but I saved the best for last.

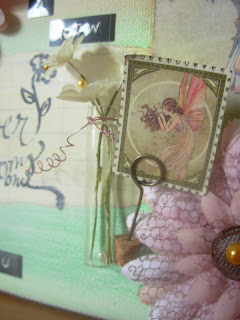
This is a toilet paper roll mini and compared to the others it could actually be considered an itty bitty mini

So like the other styles this one has 6 pages, it has medium weight chip board covers, it has orange pull-out tags, and it has a ribbon closure.
The cover on this one though is NOT pattern paper but instead a BLING mesh that I glued to the orange card stock cover.
I think I may be in love with this bling mesh too by the way, it's super easy to use and oh so sparkly.

As for the pages I decided to cover those with the pattern paper from the same stack that I've been using throughout this series and then to dress them up with some smaller die cuts and journal spots that I made using my computer.

The reason for using die cuts on some of the pages is because a book this small is really difficult for some to get pictures small enough to fit, so I figure you print at home in either a 2 x 2 square format or print in a 3.5 x 5 format and then just size them down accordingly. Me personally, I'm am going to print using the 'contact' setting for my printer, which is 35 photos at about 1 x 1. Once I have them printed I am going to use my square punch that fits around the individual photos the best and just punch it out and go with that.

Also I mentioned that I did some journal spots on my computer...I wanted to have something that had a lot of room to write on and lines are usually the best in keeping my writing consistent so I created a whole sheet of nothing but lines as close together as I could get them but still being able to 'write' on them using either a pen or a sharpie (which is my go-to writing tool) then I cut them down to fit 'tucked in' to the photo tuck that I made for a couple of the pages as well.

I added in a few extras such as this pennant to add some interest and then a few paper clips to help keep things in their place.

For the last page I created a 'confetti bag' that I thought turned out really cute, attached a mini label to the top and stapled it so that all it's stuff wouldn't fall out, then adhered it to the page using a Velcro adhesive dot, that way if you ever did want to toss the confetti, you could.
So there you have it, the final book, the last of this series. Any thoughts? I have to say that I am really glad I took on this huge challenge, knowing that I was able to meet a dead-line and still create something that I could be proud of. Now that my local sell is finished, I think that I will over time add a bit more to each of these books and then list them in my Etsy Shop so for those of you who are interested keep an eye out there for them.
Once again I thank you all for stopping in to take a look at my creations, for this hobby is a passion of mine and I am happy to share it in any way that I am able.
Hoping you have a wonderful week ahead!
just B
.jpg)
Comments