Flipped Out Mini
Hello Hello
Hope everyone is off to a fun filled summer, enjoying the time inside or outside doing what you love.
Today I wanted to share with you one of the mini books that I made for Pirates Cheer here in my hometown. This one I am calling:
Flipped Out Mini
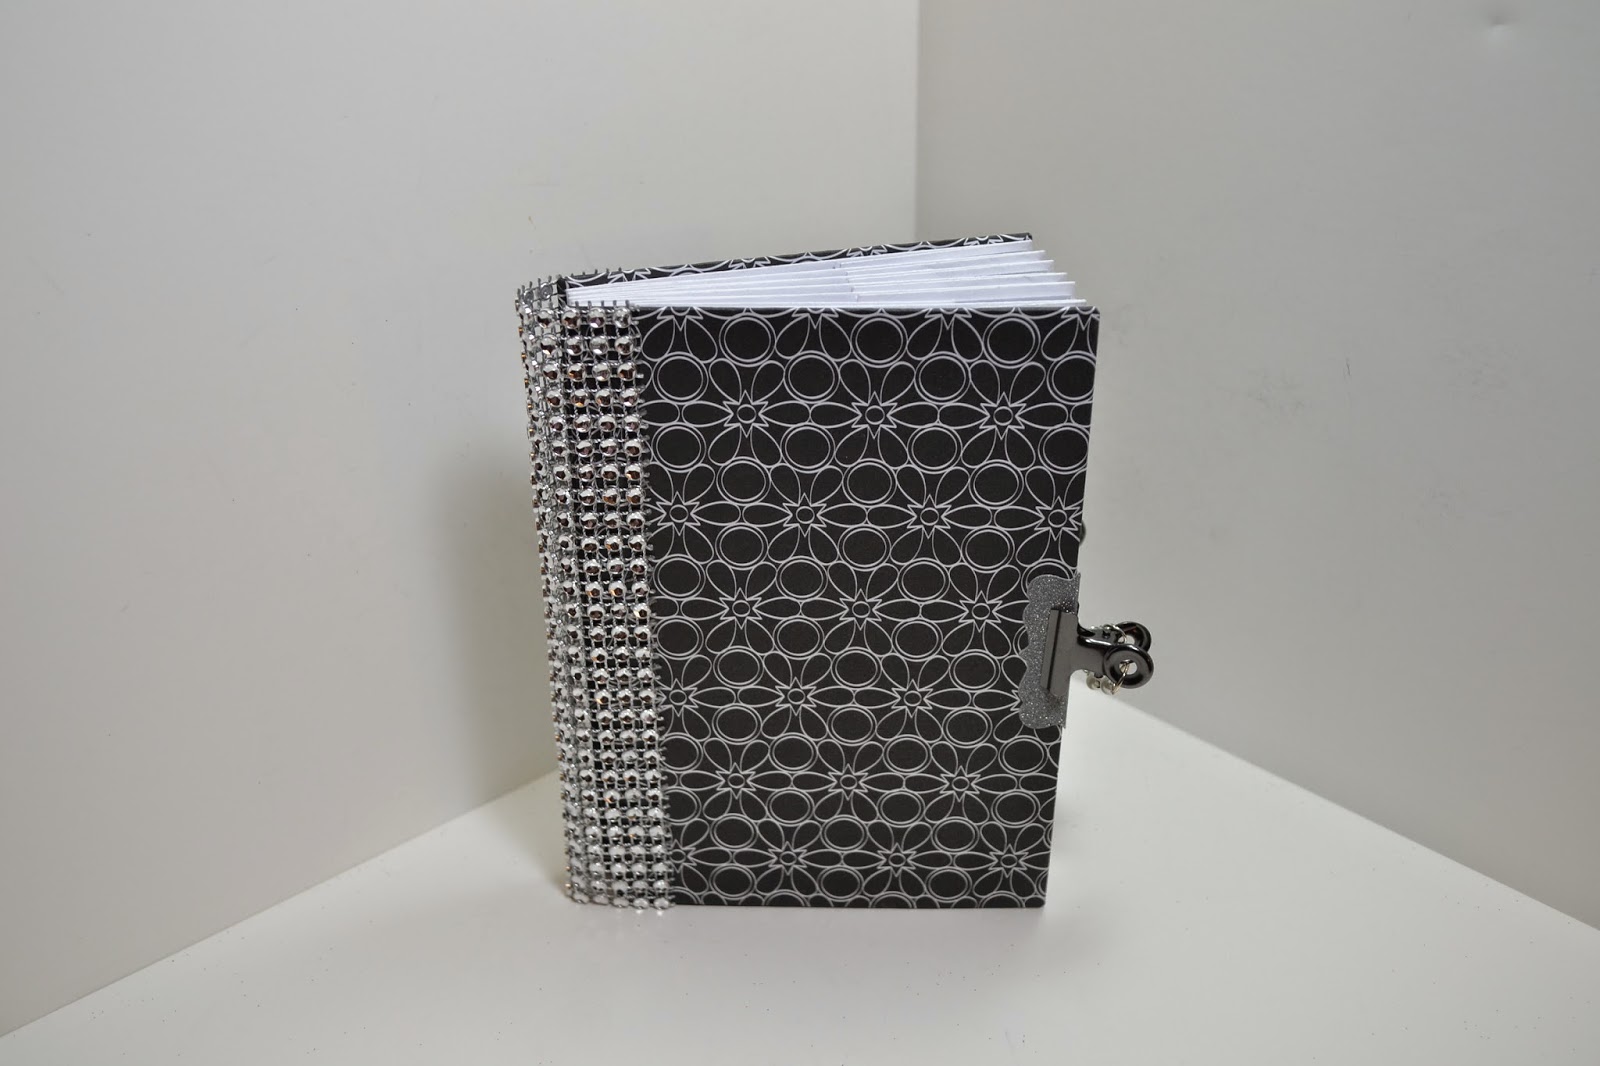
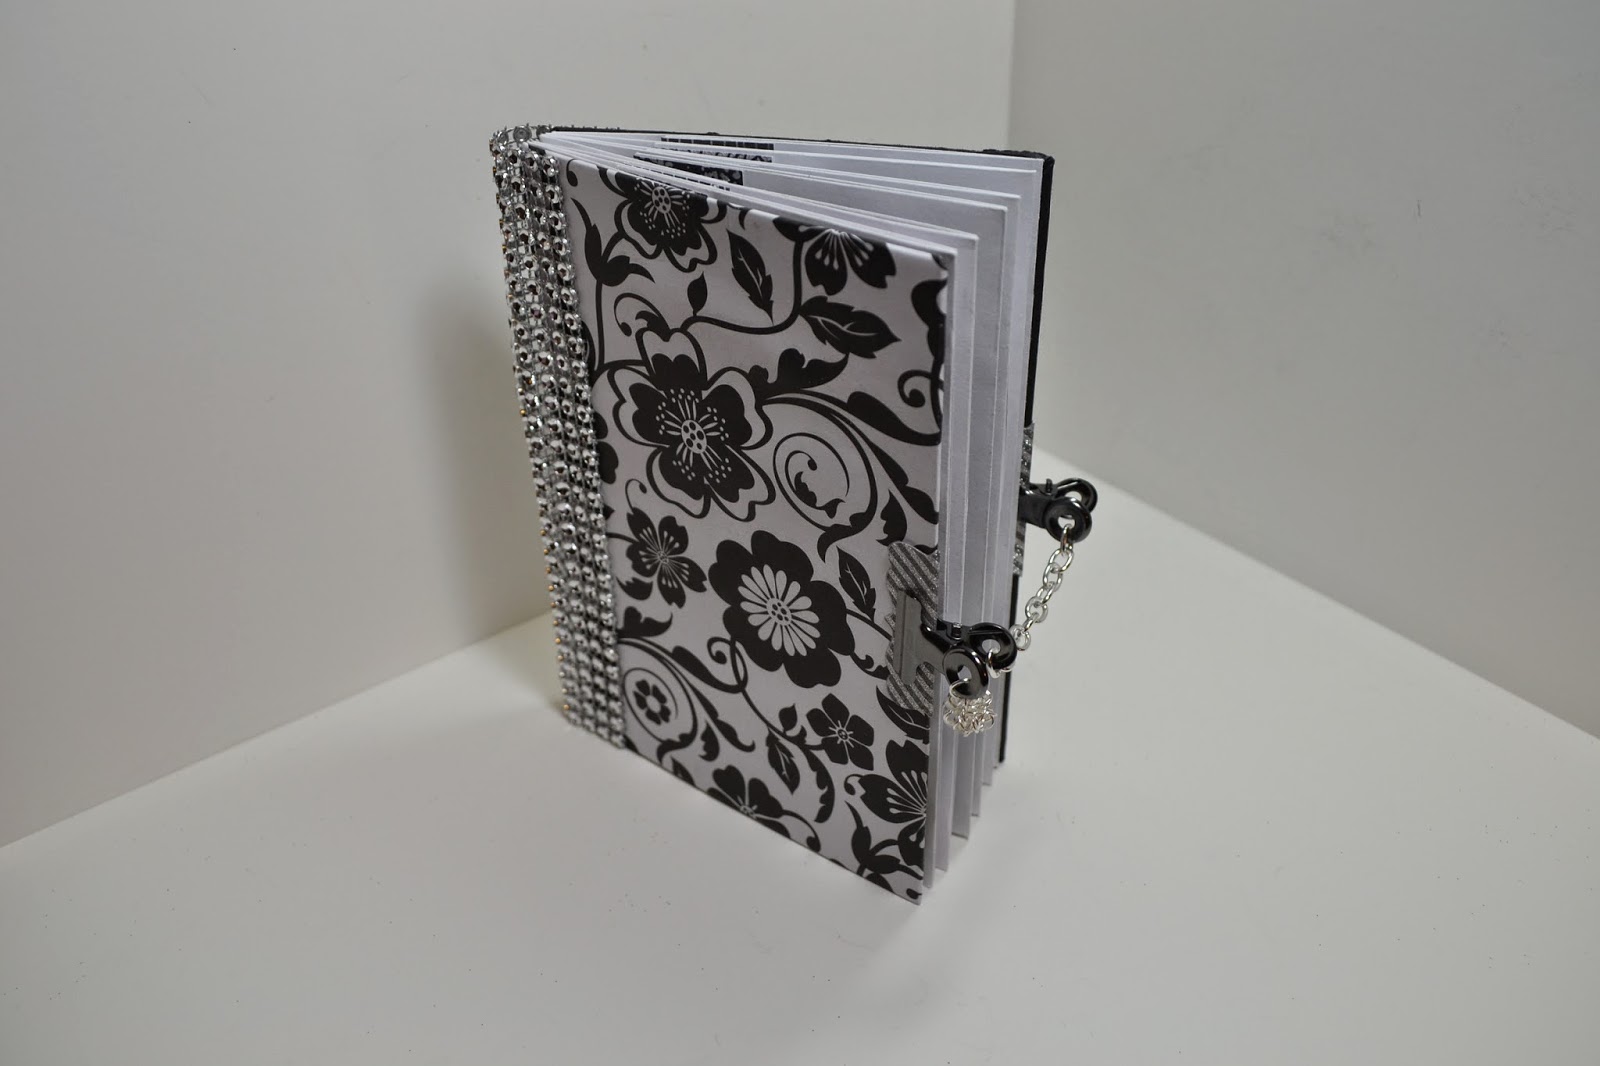
This mini is made using the 6 by 9 office envelopes. There are 6 pages total and tons of pockets to add photos and private notes.

For the envelopes I sealed off the open end of it and then cut about an 1/8 of an inch from each end, essentially creating a paper tube.

Then I took my score board and with the long side up against the top of it I scored at 3 inches and then again at 7 inches. That gave me 3 panels essentially to work with.

The first panel is 3 inches wide and 6 inches tall. The 3 inch panel will be adhered to the back of the envelope that sits in front of it. With the ends of the folded envelope having been cut off previously, this will create the first pocket.

The next panel is 4 by 6 which is perfect for a photo, also this is the panel that is the back for the next envelope to be adhered to.
The third and final panel is that 2 inch by 6 inch strip...this little guy will be folded in creating a flap, of course with the end of it having been cut off previously too, it also gives us another pocket...a somewhat hidden pocket.

Now when you get as many pages as you want - the two end envelopes (the front & the back) will be adhered to a pre-covered (just one side for both covers) slightly larger than 4 by 6 inch piece of chip board.

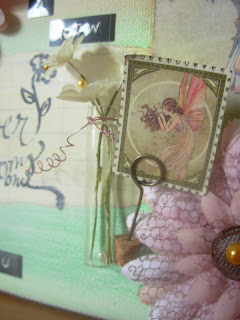
Once you have the covers on correctly you will want to finish off the inside of the front cover (the envelope panel should cover the entire inside of the back cover). For this I use just a piece of whatever pattern I've been working with throughout. I like to 'tuck' my pattern into that first pocket because it makes it look a lot nicer with a cleaner finish.

In this photo above you can really tell what I mean, the flower pattern is my finishing piece and it is tucked into the white portion of the envelop. That strip of black is just to give the top part of that envelope some extra support and act as a finishing piece as well or even a journaling spot.

The center panel is where you would adhere your photo (4 by 6) and then the right side is that flap panel where you could add more photos or some ephemera or some journaling or just whatever you deem worthy.
For my closure (because this album tends to spread open I like adding the closure piece to keep all the contents contained) I used two bull nose clips from Tim Holtz' Ideaology line and connected them using a silver chain, one clip clips to the front cover and the other clip clips to the back cover.
One final embellishment you could add if you so desire is a cover over your spine. Because of the way this album is bound, on the spine all you see is all the envelopes so I choose to cover my spines with a 2 inch by 6 inch piece of gem fabric. My wet glue (Beacon 527) is a multi-use type of glue and it works perfect for adhering this on. When you do so though, make sure you only glue whatever you are using to the cover pieces only, don't get it on the envelopes because then your book won't open correctly.
Hope you like...and let me know if you have any questions or suggestions. Thanks so much!
just B
.jpg)
Comments