The New 'Little Black Book'
Hello Hello
Oh My Goodness...where has the time gone? I swear I did not mean to leave and hang you out to dry please forgive my absence.
I can't say for sure what exactly I have been doing...except well maybe the truth is I've been reading...again! I still can't seem to get enough, I've already read a handful more of books this year so far as I did all of last year combined, that's crazy! And I've yet several more that are waiting patiently for me to pick up and devour...lol

But let me think...there is something else I've done recently...?
Oh yes of course how could I forget I found my scrap room and I cleaned it, ooo and I've been using it too...to create...yay!!!
Although the piece I am going to share with you today is from last Fall, it will give you a very good idea of what I've been practicing lately - Mixed Media - and I can say without a doubt that this is my favorite form of art right now.

So what I have here is an altered recipe box that I turned into an address box. My mom really liked what I had created for my grandma on her birthday here and so this was her birthday request, a new address book - mixed media style I just took it one step further and made it with a box instead of a book because it seems to be more efficient this way way more hip.

On the inside I used standard alphabet index cards and then created my own version of an address postcard to slip in behind each letter, depending on how one files addresses (ie: last names or first names) it really doesn't matter; also if you need to go back to someone in particular to update their information, instead of having white-out or an eraser mark on your page, you simply remove the postcard and create a new one if you wish.

On my information postcard I included all the important pieces that I could think of:
name/address/cell phone/email/website/notes
And my thought was that in the notes section one could add in: birth dates/anniversary dates/graduation dates, also maybe include keywords like PTA or Girl Scouts.
I find it absolutely astounding how many phone numbers I have collected since my oldest daughter has started elementary school-the schools number, parents of friends numbers, the Girl Scouts leader's number, the dance studio's number - it is ridiculous and there is no way I'd ever keep them all straight without being able to attach a keyword to it (thank goodness for smart phones-this is where the idea came from) so there you have my somewhat sane reasoning

As for the box I started with two coats of gesso and then added on some tulle to create texture once that dried I used several stencils and used texture paste to create even more texture, after that I adhered a paper die cut then started in with the dimensional pieces, the first few pieces I included were ones that I made using clay-so going to do this again-they turned up beautiful in this project...the compass on the top is one of the pieces I made several months ago. When I do clay embellishments I try to do a whole batch of them all at once so that I can save myself time and effort later, I am due to make some more soon as I have pretty much used up everything I made in my last batch *note to self: post when done*. Also I stick to using just plain white clay, the kind that you have to bake (another reason I do it in batches) because after you bake them you can paint them whatever color you want therefore no need to spend more money on the colored clay in my opinion.
Anyways I got off track here...once I got all of my clay pieces down I used a few other bits and pieces then added my phrase using letter stickers painted the entire piece with one more coat of gesso let it dry then added my color sprays.
Anyways I got off track here...once I got all of my clay pieces down I used a few other bits and pieces then added my phrase using letter stickers painted the entire piece with one more coat of gesso let it dry then added my color sprays.
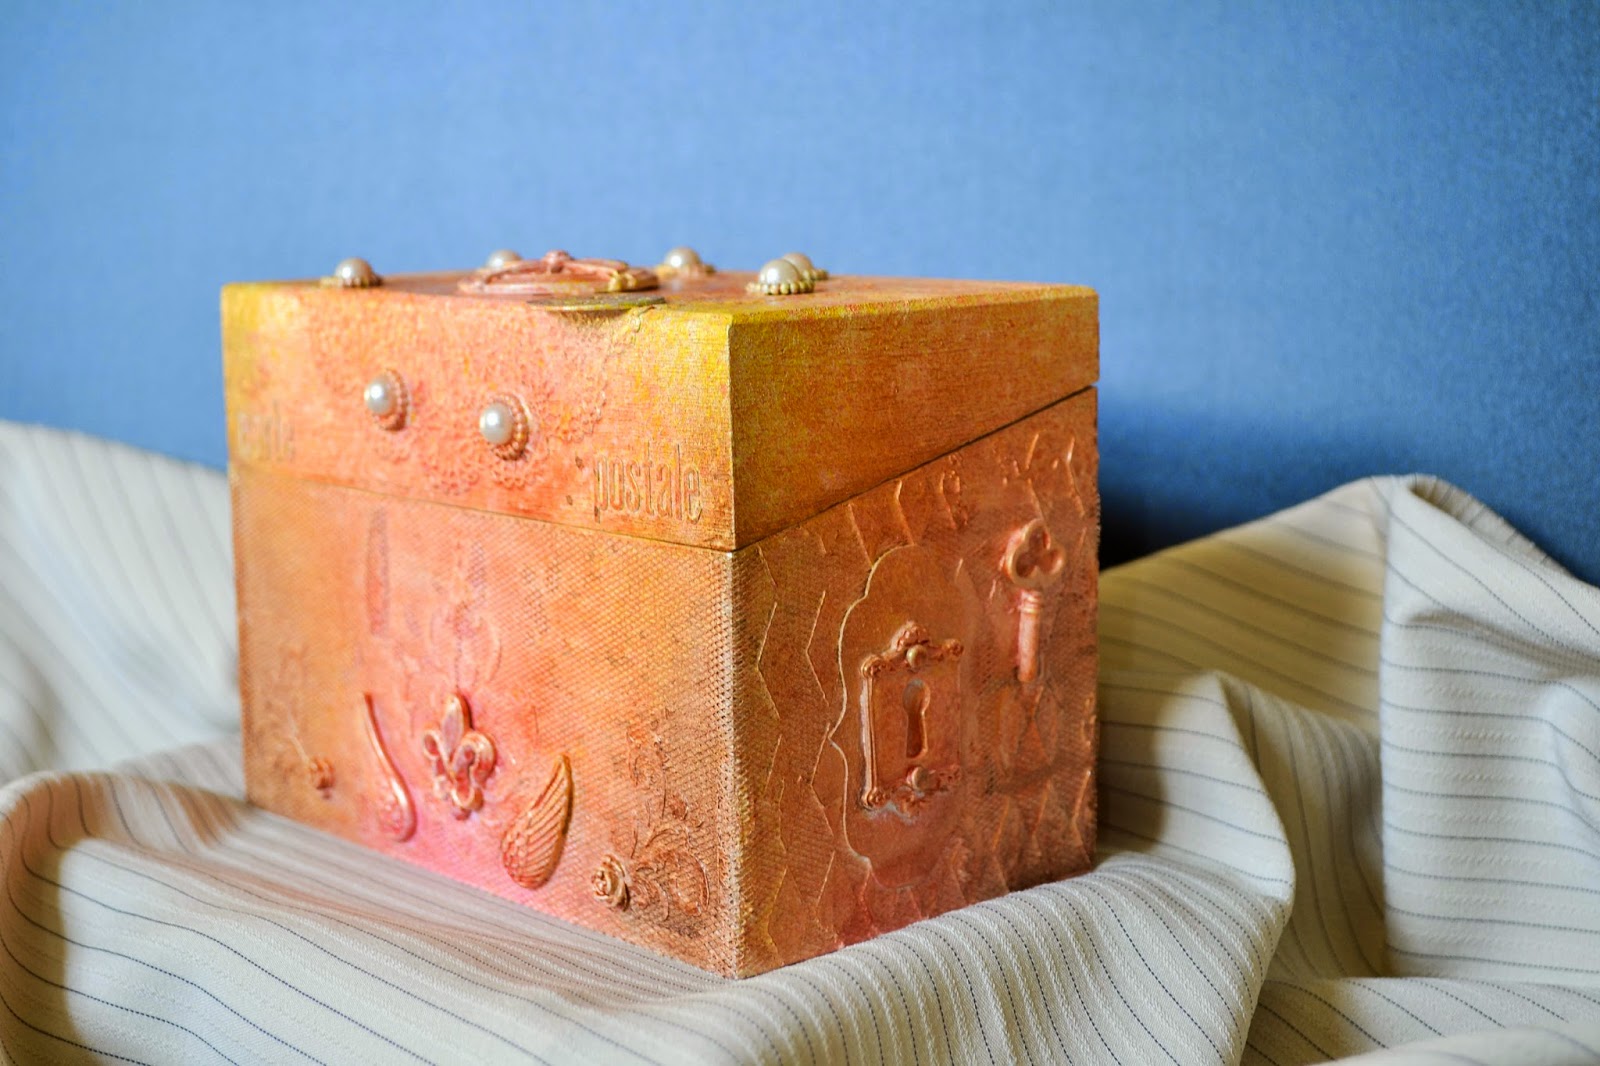
From this angle along the side you can see the harlequin stencil work, the paper die cut that frames the clay key hole, the clay key, and maybe quite possibly the tulle that wraps around the corner. Along the front you might be able to see the clay angel's wings, the clay fleur de lis, the clay roses, the flourish stencil work, the phrase 'carte postale' in sticker letters, and then maybe the paper doily that I forgot to mention earlier.

It blows my mind every time I create one of these projects, layer upon layer that creates tons of textures and then all of the random bits and pieces followed by beautiful colors that make one final piece...
a work of ART
there is no other word for it - it's ART
and it is beautiful!
I so hope you are inspired because I encourage you to create your own Art, make it you whatever you can dream up and go for it!
Thank you for stoppin' in and have a fabulous day.
just B
a work of ART
there is no other word for it - it's ART
and it is beautiful!
I so hope you are inspired because I encourage you to create your own Art, make it you whatever you can dream up and go for it!
Thank you for stoppin' in and have a fabulous day.
just B
.jpg)
Comments