Vintage File Alterations Heidi Swapp Style
Hello Hello
How are you? And where have you all been?...oh whoa wait...that's on me...where in the heck have I been? On a creative furlough I think but it's slowly coming back to me...I can feel it and my need to read has subsided so I'm getting a bit excited to start creating again, it's been a long while no doubt...of course in all things there is that ebb and flow it's just a matter of how we handle the tide.
I do hope your days are all filled with love and laughter, maybe even a few crafty things from time to time.
I have a bit of a confession... this post has been in the works for awhile now, I'll type up the intro then work on the main body then go back a few days later and redo the intro...it quite honestly is starting to annoy me on how long it's taken me to get this post up...but now I know why.
It is not on purpose but it seems fitting now...
I'm not sure how many of you are familiar with the infamous Heidi Swapp - she is a lifer like myself in this wonderful and amazing hobby...she has created product over and over and over and is still one of the best in the biz...just recently she lost her 2nd to oldest son, Cory, unexpectedly and so I am dedicating this post to her beloved son.
My thoughts and prayers go out to their family and friends.

So for today we're kickin' it old school with Heidi Swapp or at least one of her original file folder concepts. This is pre Memory File and the only reason I had stumbled across it is because I'd taken a class at Creating Keepsakes Expo oh gosh probably 7-8 years ago that was a techniques class hosted by Tattered Angels and sponsored by Heidi Swapp or so I assumed. Never-the-less in scrapbook terms it's definitely 'old' but ironically enough
back in style...
back in style...
fancy that!

So I had this in my stash just waiting patiently for the right moment, I didn't even have it finished from the class version but knew at that time years ago that I wanted to wait...
so glad I did because the perfect opportunity came up last month when a dear friend of mine turned *39...again!
I wanted to surprise her with something special and this just seemed to fit the bill so I pulled it out, sorted through all the pieces, set aside what I knew I wouldn't use and then gathered some new pieces to use instead.

Now the way the pages are set up is hard to explain but I will try. If you'll take a peek at the photo above you'll see that there are only four pages - two being the covers and then two inside pages as well. What makes this interesting is that each page has another page that flips up by way of this...

Using the two pronged paper fasteners at the top of each page there is another page added to make triple the page space and creating a unique sort of scrapbook.

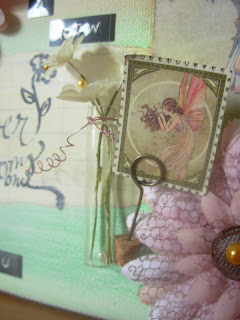
Now for some reason the photo above is the only one I've taken of the front of each flap but as you'll notice I added a string closure styled envelop to each side where I also included 2 journaling cards for documenting life. Keeping the open space next to each envelope not only adds to the flow of the entire piece, it also gives more space so that more photos can be added in if someone has a mind to. I did all the fronts of the flaps just like this so there are lots of spots for journaling and lots of hiding spots for all the extra 'stuff'.

As for the backs of each flap, which is the side you see when you flip it up, I kept them just as they were - I didn't want to add anymore spray mist to them because I didn't want it to leak through to the front but I did however add on a few of the tags that came with the project. This class was partnered with Tattered Angels and so the tags were a couple of the 'ir*resist*ibles' from the Rockin Renaissance collection (exclusively Heidi Swapp). The other reason I left the backs blank is because it's a perfect spot for 'hidden' photos and depending on what size you print - there is a lot of real estate.

Now as for what is on the actual page and hiding under that flap...well I again did most of the pages the same or at least with the same concept. There is on the left hand page another envelope that I left open with a pull out tag that I embossed with a favorite quote, then I also tucked under each of those envelopes a small post card that I made using my stamps and some cream card stock.

On the right hand page I made a second post card and glued down just the bottom right hand corner to create a photo/ephemera tuck. I really like interactive albums and with this one being all jumbled up anyways I thought, 'what the heck'.

Now of course me being me, I didn't follow my own design to the T on the last page I think...I flip-flopped the right and the left base pages, meaning that the open envelope with the embossed pull out tag ended up on the right hand side and the postcard corner tuck was adhered to the left hand side but honestly it still works in a cohesive form because it was the same embellishment throughout.

So there you have it...a mixed up - flipped up - and flipped out mini file folder scrap book - Heidi Swapp style...how fabulous is that?
I think my girl friend really liked it - the fact that it's not only artsy but photo friendly and with all the hidden journal spots it's quite 'story' friendly too, what more can you ask for?
I think my girl friend really liked it - the fact that it's not only artsy but photo friendly and with all the hidden journal spots it's quite 'story' friendly too, what more can you ask for?

So what do you think? Do you like it? I will definitely be recreating something more along these same lines as I found this to be quite unique and extremely interactive. If you have any questions for me please feel free to contact me I would love to hear from you.
Hope you have a wonderful weekend and if you have a moment please send your thoughts and/or prayers to the Swapp family...hug your loved ones that are close...call those that are far...and give a bit of thanks for all the wonderful people in your everyday life.
Hope you have a wonderful weekend and if you have a moment please send your thoughts and/or prayers to the Swapp family...hug your loved ones that are close...call those that are far...and give a bit of thanks for all the wonderful people in your everyday life.

Thanks!
just B
just B
.jpg)
Comments